
Table of Contents
Sunday dinners are about bringing families together with delicious, hearty meals. The beef arm roast recipe offers a mouthwatering centerpiece that transforms an ordinary meal into a memorable gathering. Cooking this incredible dish might seem intimidating, but with the right techniques, anyone can create a restaurant-quality roast right in their own kitchen.
This beef arm roast recipe is designed for home cooks who want to impress their loved ones without spending hours in the kitchen. The cut is perfect for slow roasting, allowing the meat to become incredibly tender and flavorful. With simple ingredients and straightforward preparation, you’ll discover how easy it is to make a stunning main course that will have everyone asking for seconds.
Key Takeaways
- Beef arm roast is perfect for family dinners
- Simple preparation makes this recipe accessible to all skill levels
- Slow roasting ensures maximum tenderness
- Minimal ingredients create maximum flavor
- Works great for meal prep and leftovers
Understanding the Perfect Beef Arm Roast Cut
Selecting the right cut of beef can transform your cooking beef chuck roast experience from ordinary to extraordinary. The beef arm roast, a flavorful cut from the chuck primal, offers home cooks a delicious and versatile option for creating memorable meals.
The arm roast comes from the shoulder area of the cow, which means it contains muscles that work hard. This characteristic gives the meat a rich, deep flavor profile that home cooks love. When cooking beef chuck roast, understanding the cut’s unique properties is crucial for achieving tender, mouth-watering results.
Anatomy of the Arm Roast
Located in the chuck primal section, the arm roast consists of multiple muscle groups. Its composition includes:
- Tough, well-exercised muscle fibers
- Significant connective tissue
- Moderate fat content
Quality Indicators When Selecting Your Roast
When shopping for the perfect arm roast, pay attention to these key quality markers:
- Color: Look for bright red meat with minimal brown spots
- Texture: Firm to the touch with smooth muscle fibers
- Fat distribution: Even marbling throughout the cut
Marbling and Its Importance
Marbling refers to the white fat streaks running through the meat. For cooking beef chuck roast, good marbling is essential. These small fat deposits melt during cooking, creating incredible tenderness and deep, rich flavor that transforms a simple roast into a culinary masterpiece.
Pro tip: The more consistent and fine the marbling, the more succulent your roast will be!
Essential Kitchen Tools and Equipment for Roasting
Preparing delicious high protein ground beef recipes requires more than just quality ingredients. The right kitchen tools can transform your cooking experience and elevate your roasting skills to professional levels.
Every home cook needs a set of essential tools to create perfect roasts. Professional chefs understand that great equipment makes a significant difference in meal preparation.
- Roasting Pan: A heavy-duty pan with high sides helps collect delicious drippings and ensures even heat distribution for high protein ground beef recipes
- Meat Thermometer: Crucial for checking internal temperatures and preventing overcooking
- Sharp Carving Knife: Ensures clean, precise cuts for serving
- Kitchen Twine: Helps maintain roast shape during cooking
- Aluminum Foil: Useful for covering and resting meat
Investing in quality kitchen tools doesn’t mean breaking the bank. Many affordable options can help you create restaurant-quality roasts right in your own kitchen.
Professional tip: Choose tools that are durable, easy to clean, and versatile for multiple cooking techniques.
When selecting equipment, focus on functionality and comfort. Ergonomic handles, sturdy construction, and heat-resistant materials will make your cooking experience more enjoyable and successful.
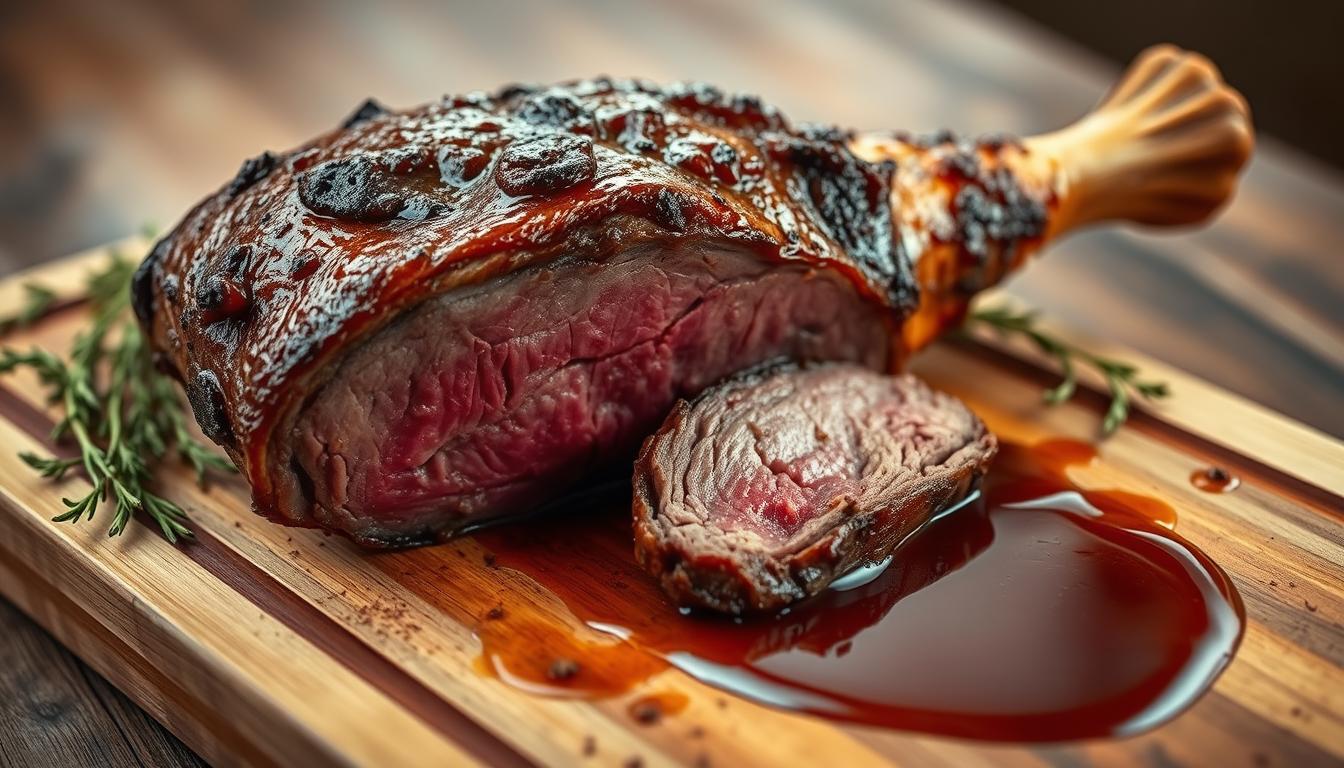
The Ultimate Beef Arm Roast Recipe
Preparing a perfect beef arm roast requires precision, passion, and the right technique. Whether you’re a home cook or a culinary enthusiast, this recipe will guide you through creating a mouthwatering chuck roast that will impress your family and friends.
Cooking a tender and flavorful chuck roast depends on understanding the right chuck roast temp and preparation methods. Let’s dive into the details that will transform your roast from ordinary to extraordinary.
Ingredient List and Portions
- 4-5 pound beef arm roast
- 2 tablespoons kosher salt
- 1 tablespoon black pepper
- 3 garlic cloves, minced
- 2 tablespoons olive oil
- 1 cup beef broth
Step-by-Step Preparation Guide
- Remove roast from refrigerator 1 hour before cooking
- Pat meat dry with paper towels
- Season generously with salt and pepper
- Preheat oven to 325°F
- Sear roast in hot skillet for 4-5 minutes per side
- Transfer to roasting pan
- Add beef broth to bottom of pan
Cooking Time and Temperature Chart
| Doneness | Internal Temp | Cooking Time |
|---|---|---|
| Rare | 125°F | 20-25 minutes per pound |
| Medium Rare | 135°F | 25-30 minutes per pound |
| Medium | 145°F | 30-35 minutes per pound |
Remember, achieving the perfect chuck roast temp is crucial for a delicious meal. Always use a meat thermometer to ensure accurate cooking and optimal flavor.
Perfect Roast Seasoning Combinations
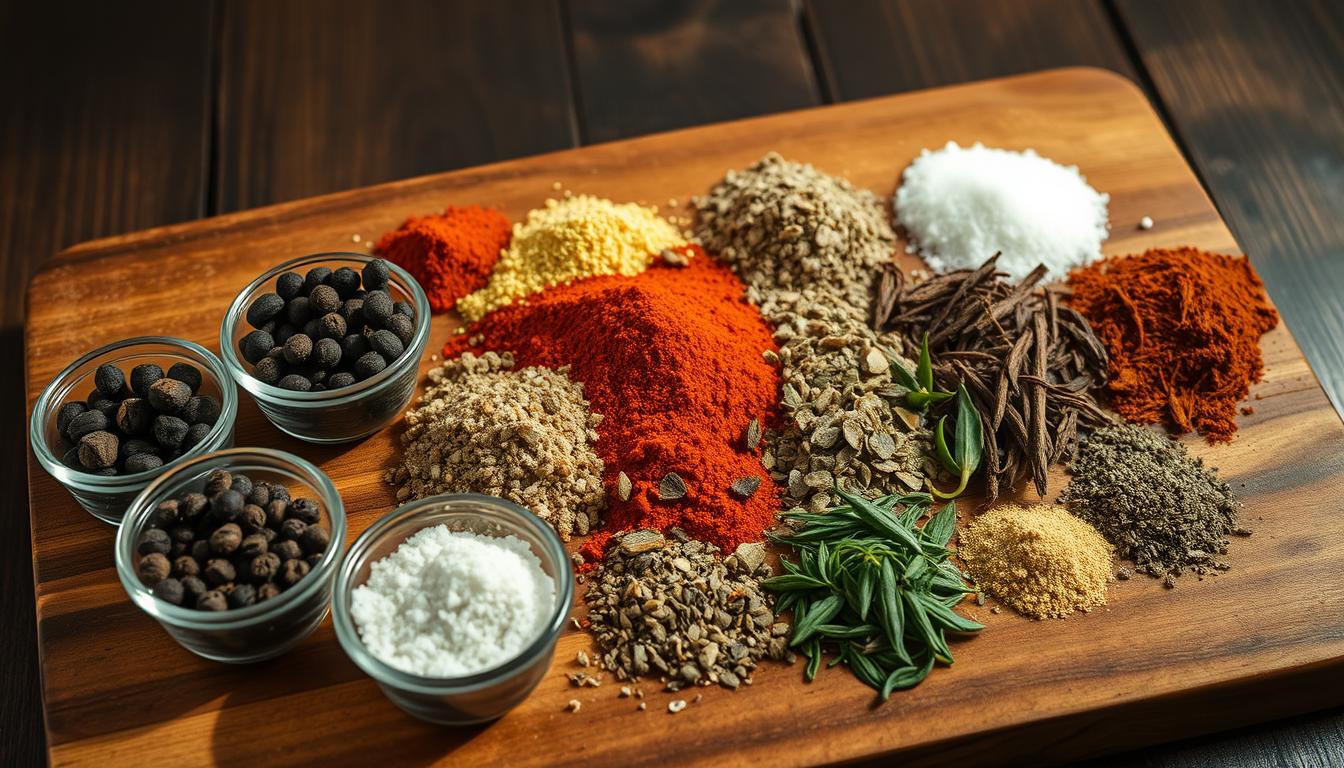
Elevating your beef arm roast from good to extraordinary starts with the right roast seasoning. The magic of a memorable meal lies in the careful balance of herbs and spices that complement the rich, natural flavors of the meat.
Creating the perfect roast seasoning is an art form that transforms an ordinary cut into a culinary masterpiece. Whether you’re looking for classic seasonings or exploring bold Mexican steak seasoning options, the key is understanding how different spices interact with beef.
- Classic Roast Seasoning Blend:
- Kosher salt
- Cracked black pepper
- Dried rosemary
- Garlic powder
- Dried thyme
- Mexican Steak Seasoning Twist:
- Smoked paprika
- Chili powder
- Cumin
- Oregano
- Sea salt
Pro tip for home chefs: Always rub your roast seasoning generously and let it sit for at least 30 minutes before cooking. This allows the spices to penetrate the meat, creating a more intense flavor profile.
“The right seasoning can turn a simple roast into a memorable dining experience.” – Professional Chef
Experimenting with different roast seasoning combinations helps you discover unique flavor profiles that suit your taste. Don’t be afraid to mix and match spices – cooking is about creativity and personal preference.
Mastering the Internal Temperature
Achieving the perfect internal temperature of brisket or arm roast is crucial for creating a delicious, tender meal. Understanding temperature control can transform an ordinary roast into a culinary masterpiece.
Cooking beef requires precision. The internal temperature of brisket and similar cuts determines the final texture and flavor of your roast. Professional chefs know that temperature is the key to unlocking incredible taste and tenderness.
Temperature Stages for Different Doneness
Beef doneness varies based on internal temperature. Here’s a quick guide to help you achieve your desired result:
- Rare: 125°F (cool red center)
- Medium Rare: 135°F (warm red center)
- Medium: 145°F (pink center)
- Medium Well: 150°F (slight pink center)
- Well Done: 160°F (no pink)
Using Meat Thermometers Correctly
A reliable meat thermometer is essential for tracking the internal temperature of brisket and other roasts. Insert the thermometer into the thickest part of the meat, avoiding fat or bone, for the most accurate reading.
Resting Time Guidelines
After cooking, let your roast rest for 10-15 minutes. This crucial step allows juices to redistribute, ensuring a moist and flavorful result. The internal temperature will continue to rise slightly during this resting period.
Pro tip: Cover the roast loosely with foil during resting to maintain warmth without trapping too much steam.
Best Side Dishes to Complement Your Roast
Selecting the right side dishes can transform your beef arm roast from a simple meal into a culinary experience. The best side dishes for steak are those that balance the rich, savory flavors of the meat while providing complementary textures and nutritional value.
When planning healthy sides for steak, consider options that bring both nutrition and flavor to your plate. These side dishes not only enhance the meal but also provide essential nutrients to create a well-rounded dining experience.
- Roasted Vegetable Medley: A colorful mix of seasonal vegetables that adds nutrition and visual appeal
- Garlic Mashed Cauliflower: A low-carb alternative to traditional mashed potatoes
- Grilled Asparagus with Lemon Zest: A light, fresh accompaniment
- Quinoa Pilaf with Herbs: A protein-packed grain option
Pairing your roast with the right side dishes can elevate the entire meal. Look for options that provide a balance of textures and flavors – something crisp to contrast the tender meat, something light to cut through the richness.
“The perfect side dish should complement, not compete with, the main course.” – Professional Chef Recommendation
Consider creating a colorful plate that offers both visual appeal and nutritional balance. The best side dishes for steak will add variety to your meal while supporting a healthy eating approach.
Wine Pairing and Serving Suggestions
Elevating your beef arm roast experience goes beyond perfect cooking—it’s about creating a complete culinary journey. Selecting the right wine can transform your italian beef dishes from delicious to extraordinary, turning an ordinary meal into a memorable dining event.
The secret to exceptional wine pairing lies in understanding the rich flavors of your roast and matching them with complementary wine characteristics. Italian beef dishes typically demand robust red wines that can stand up to intense meat flavors.
Red Wine Selection Guide
When choosing wine for your beef arm roast, consider these exceptional options:
- Chianti Classico: A traditional Tuscan wine with bold tannins
- Barolo: Powerful red with complex flavor profile
- Sangiovese: Medium-bodied wine ideal for roasted meats
Plating Tips for Presentation
Presentation transforms a good meal into an unforgettable dining experience. Use wide, white plates to highlight the rich colors of your italian beef dishes. Garnish with fresh herbs like rosemary or thyme to add visual appeal and aromatic complexity.
“Great food is about creating memories at the table” – Chef Mario Batali
Pro tip: Let your roast rest for 10-15 minutes before slicing and serve at a slightly warm temperature to maximize flavor and tenderness.
Storing and Reheating Leftover Roast
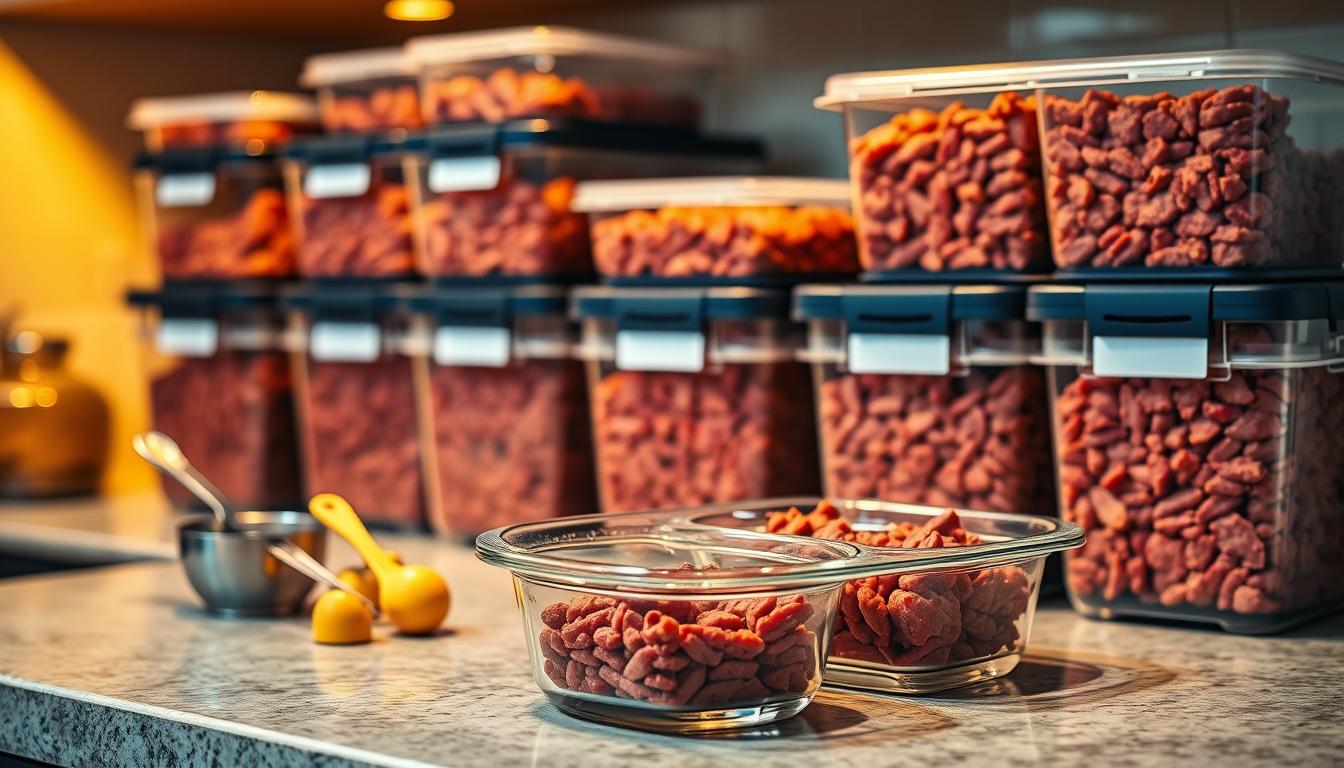
Transforming leftover beef roast into delicious high protein ground beef recipes is an art that saves both money and time. Proper storage is crucial to maintaining the meat’s quality and ensuring food safety.
To preserve your roast’s flavor and texture, follow these storage guidelines:
- Cool the roast completely before storing
- Store in airtight containers or sealed plastic bags
- Refrigerate within two hours of cooking
- Use refrigerated roast within 3-4 days
Reheating leftover roast requires careful technique to prevent dryness. Low and slow is the key to maintaining moisture and tenderness when warming your high protein ground beef recipes.
Recommended reheating methods include:
- Oven method: Wrap roast in foil, heat at 325°F for 20-30 minutes
- Slow cooker: Add a splash of broth, cook on low for 2-3 hours
- Skillet: Use low heat with a cover, add a little liquid
Creative leftover transformations can turn your roast into exciting new meals. Consider shredding the meat for tacos, adding to salads, or creating hearty sandwiches that maximize your high protein ground beef recipes.
Pro tip: Always use a meat thermometer to ensure the internal temperature reaches 165°F for safe consumption.
Troubleshooting Common Roasting Issues
Cooking beef chuck roast can sometimes present challenges, even for experienced home chefs. Understanding how to address potential problems will help you create a perfect roast every time.
Mastering the art of cooking beef chuck roast requires patience and knowledge. Let’s explore some common issues and practical solutions to elevate your roasting skills.
Fixing Texture Problems
Tough or dry meat often results from incorrect cooking techniques. Here are key strategies to ensure tender, juicy cooking beef chuck roast:
- Use low and slow cooking methods
- Choose cuts with good marbling
- Always allow meat to rest after cooking
Adjusting Seasoning Balance
Seasoning can make or break your beef chuck roast. When flavors seem off, consider these quick fixes:
- Add acidic components like vinegar or citrus
- Incorporate fresh herbs to brighten flavors
- Use salt sparingly during initial seasoning
Temperature Control Solutions
| Issue | Solution |
|---|---|
| Uneven cooking | Bring meat to room temperature before roasting |
| Overcooking | Use meat thermometer for precise temperature |
| Dry exterior | Cover with foil during initial cooking stages |
“Precision is the key to transforming a good roast into an extraordinary meal.”
Remember, practice makes perfect when cooking beef chuck roast. Each challenge is an opportunity to refine your culinary skills.
Conclusion
Creating the perfect beef arm roast recipe isn’t just about cooking—it’s about crafting an unforgettable dining experience. With the right techniques, anyone can transform a simple cut of meat into a spectacular meal that brings families together. The key is understanding your ingredients, mastering temperature control, and allowing your creativity to shine through seasonings and preparation methods.
Cooking a delicious beef arm roast doesn’t require professional culinary skills. By following the steps and tips shared in this guide, home cooks can confidently prepare a restaurant-quality dish that impresses everyone at the table. Experimenting with different seasonings and side dishes will help you develop your unique approach to this classic recipe.
We invite you to embrace the art of roasting and make this beef arm roast recipe your own. Share your culinary adventures with friends and family, and don’t be afraid to put your personal twist on the techniques you’ve learned. Every great cook starts somewhere, and mastering this recipe could be your first step toward becoming a kitchen superstar.
Remember, practice makes perfect. Each time you prepare a beef arm roast, you’ll gain more confidence and skill. Start cooking, have fun, and enjoy the delicious results of your culinary journey!
FAQ
What is the best internal temperature for a beef arm roast?
For a medium-rare beef arm roast, aim for an internal temperature of 135°F (57°C). Use a reliable meat thermometer inserted into the thickest part of the roast to ensure accuracy. Remember that the temperature will continue to rise slightly during the resting period, so remove the roast from the oven about 5 degrees before your target temperature.
How long should I cook a beef arm roast?
Cooking time varies depending on the size of your roast, but typically ranges from 3 to 4 hours at 325°F (163°C). Plan for about 30-35 minutes per pound for a tender, fall-apart roast. Always use a meat thermometer to check for doneness rather than relying solely on cooking time.
What are some great seasoning options for a beef arm roast?
Try a classic blend of salt, black pepper, garlic powder, and dried herbs like thyme and rosemary. For a Mexican-inspired twist, use a mix of chili powder, cumin, smoked paprika, and oregano. You can also experiment with Italian beef seasoning featuring dried basil, oregano, garlic, and red pepper flakes.
What are the best side dishes to serve with a beef arm roast?
Some delicious options include roasted vegetables like carrots and Brussels sprouts, creamy mashed potatoes, roasted garlic cauliflower, or a fresh green salad. For healthy sides, consider quinoa pilaf, roasted sweet potatoes, or a light vegetable medley to balance the rich meat.
How do I prevent my beef arm roast from becoming tough?
The key to a tender roast is low and slow cooking. Use a chuck roast cooking method that involves braising – cooking in liquid at a low temperature. Always let the meat rest for 15-20 minutes after cooking to redistribute the juices, and avoid overcooking by monitoring the internal temperature carefully.
Can I prepare the beef arm roast in advance?
Absolutely! You can prepare the roast a day ahead and reheat it gently in the oven. Cover the roast with foil and warm it at 325°F (163°C) until heated through. This can actually help develop even more flavor and ensure a moist, tender result.
What wine pairs well with a beef arm roast?
Full-bodied red wines work best with this rich meat. Consider a robust Cabernet Sauvignon, Malbec, or Syrah. These wines have enough depth and tannins to complement the savory flavors of the roast and stand up to its richness.
How should I store leftover beef arm roast?
Store leftover roast in an airtight container in the refrigerator for 3-4 days. For longer storage, you can freeze the meat for up to 3 months. When reheating, add a little beef broth to keep the meat moist and prevent it from drying out.