
Table of Contents
Mastering the internal temperature of brisket can transform an ordinary barbecue into a culinary masterpiece. Home cooks across the United States often struggle with achieving that perfect, tender brisket that melts in your mouth. Understanding the precise temperature control is the key to unlocking exceptional flavor and texture.
Brisket preparation is an art form that requires patience, skill, and precise temperature management. From selecting the right cut to monitoring the internal temperature throughout the cooking process, every step matters. This guide will walk you through the essential techniques to ensure your brisket turns out succulent and delicious every single time.
Whether you’re a backyard grilling enthusiast or a barbecue competition hopeful, knowing the intricacies of brisket temperature can elevate your cooking game. We’ll explore everything from equipment recommendations to temperature milestones that guarantee a mouthwatering result.
Key Takeaways
- Precise temperature control is crucial for perfect brisket
- Understanding the internal temperature of brisket prevents overcooking
- Proper equipment makes temperature monitoring easier
- Different cooking stages require specific temperature ranges
- Patience is the most important ingredient in brisket preparation
Understanding the Basics of Brisket Temperature
Mastering the art of cooking beef requires deep knowledge of temperature control. Whether you’re preparing a chuck roast or a brisket, understanding meat science is crucial for achieving tender, flavorful results.
Cooking beef is more than just applying heat. The temperature impacts how proteins break down and how moisture is retained in the meat. Different cuts like chuck roast and brisket respond uniquely to cooking temperatures.
The Science Behind Perfect Brisket
Beef contains complex protein structures that transform during cooking. When heating chuck roast temp reaches specific ranges, collagen breaks down into gelatin, creating that melt-in-your-mouth texture every cook desires.
- Protein denaturation occurs between 120-160°F
- Collagen begins breaking down around 160°F
- Fat rendering happens near 170°F
Why Temperature Control Matters
Precise temperature management separates average cooks from culinary experts. Cooking beef chuck roast demands careful monitoring to prevent drying out or undercooking.
| Beef Cut | Ideal Cooking Temp | Cooking Time |
|---|---|---|
| Brisket | 225-250°F | 1-1.5 hours per pound |
| Chuck Roast | 225-275°F | 1-1.25 hours per pound |
Different Grades of Brisket and Their Cooking Points
Beef grades significantly impact cooking strategies. Prime grade briskets have more marbling, allowing more forgiving temperature ranges during cooking beef chuck roast preparations.
- Prime grade: Most forgiving, rich flavor
- Choice grade: Good marbling, requires precise temperature
- Select grade: Leanest, most challenging to cook perfectly
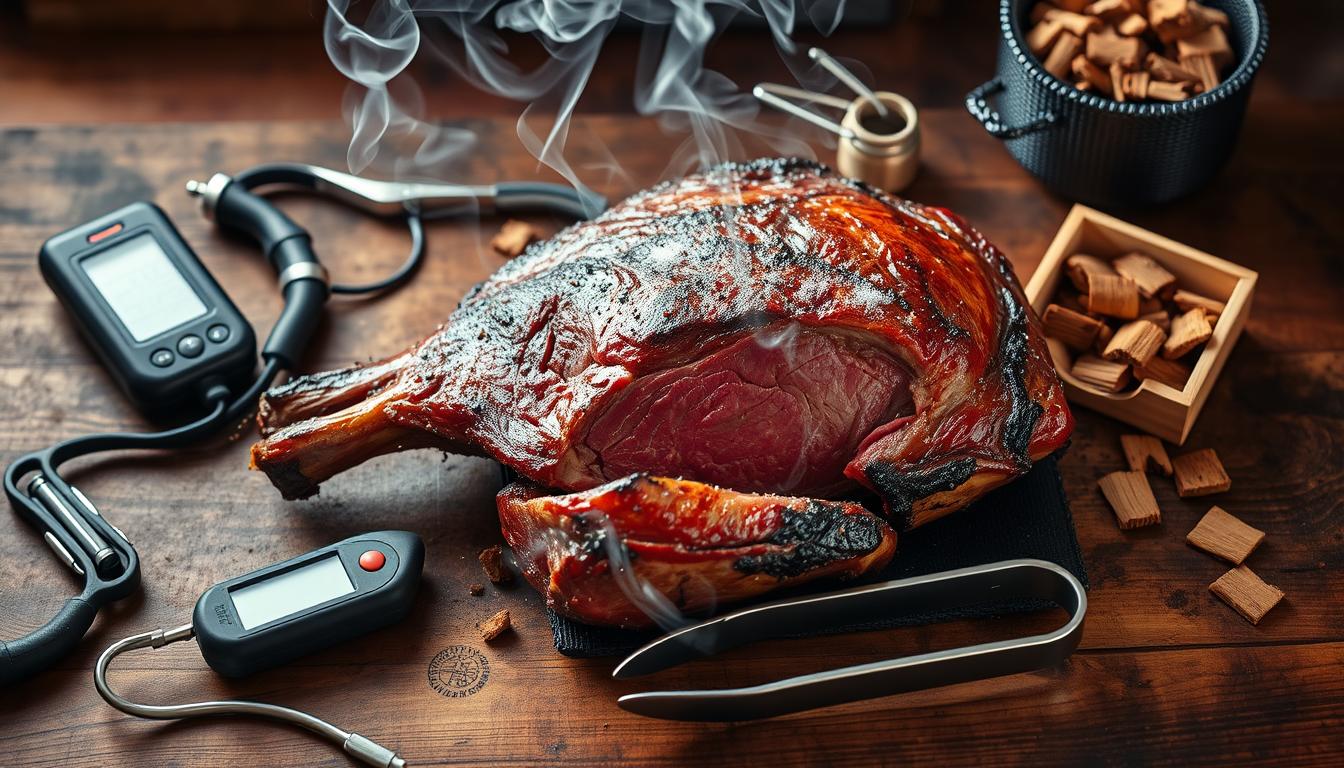
Essential Equipment for Monitoring Brisket Temperature
Tracking the internal temperature of brisket requires precision and the right tools. Professional pitmasters know that accurate temperature measurement is crucial for achieving perfect barbecue results.
When monitoring the internal temperature of brisket, you’ll want to invest in high-quality temperature measurement devices. Several key options can help you master your cooking technique:
- Digital Instant-Read Thermometers: Quick and accurate readings within seconds
- Wireless Probe Thermometers: Allow remote temperature tracking
- Bluetooth-Enabled Smart Thermometers: Sync with smartphone apps
Choosing the right thermometer depends on your specific cooking style and budget. Digital instant-read models work best for quick spot checks, while wireless probes provide continuous monitoring during long smoking sessions.
Key features to consider when selecting a brisket temperature monitoring device include:
- Temperature accuracy
- Response time
- Battery life
- Durability
- Temperature range
Calibrating your thermometer regularly ensures consistent and reliable internal temperature of brisket readings. Professional chefs recommend checking calibration before each major cooking session to guarantee precision.
“A great thermometer is a pitmaster’s best friend.” – BBQ Expert
Invest in a quality temperature monitoring tool to elevate your brisket cooking skills and achieve consistently delicious results every time.
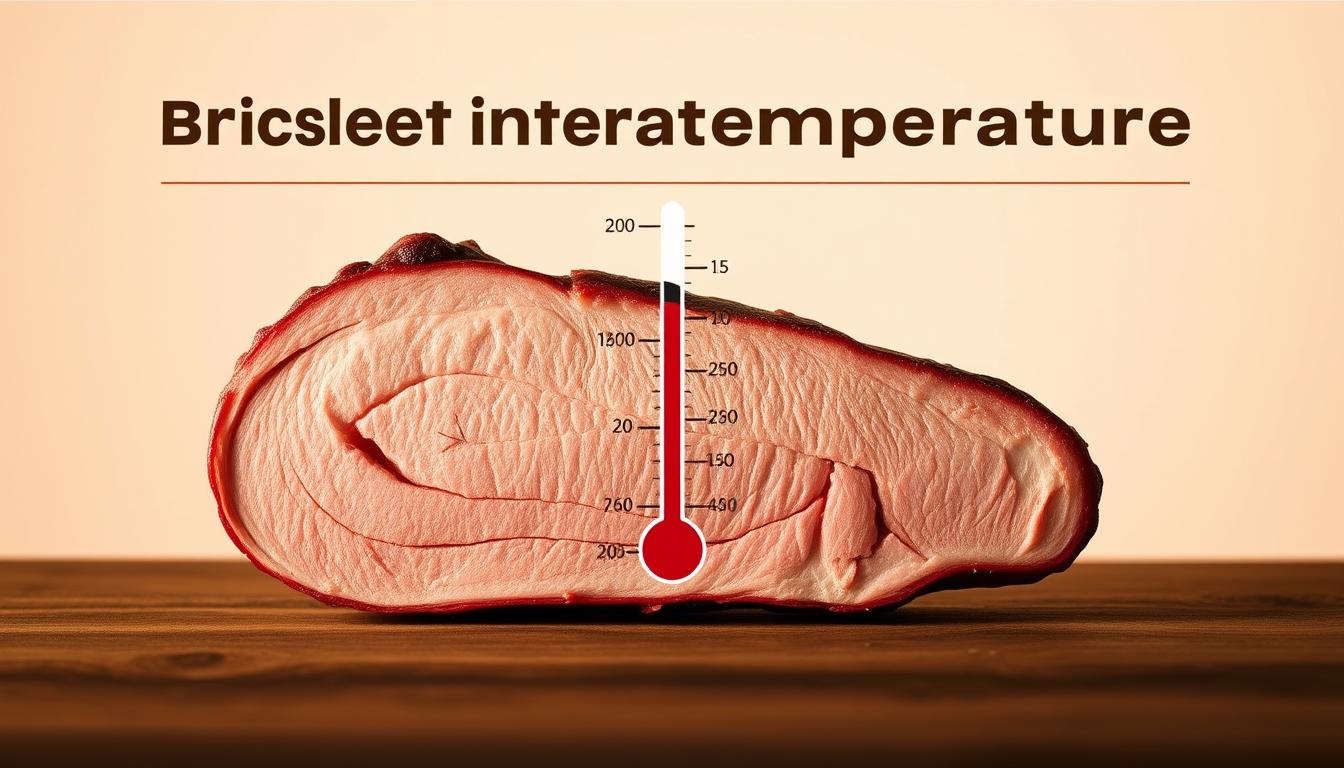
Internal Temperature of Brisket: Key Milestones During Cooking
Mastering the internal temperature of brisket is crucial for creating a mouthwatering, tender meal that will impress even the most discerning barbecue enthusiasts. Understanding the temperature journey of your brisket can transform an average cook into a true pitmaster.
Cooking brisket is a delicate process that requires patience and precision. The internal temperature of brisket follows a unique path that can challenge even experienced chefs. Unlike other cuts like chuck roast temp, brisket demands special attention to its temperature progression.
The Stall Period Explained
Barbecue experts know the infamous “stall” as a critical phase in brisket cooking. During this period, the internal temperature appears to stop rising, typically around 150-160°F. This phenomenon occurs due to evaporative cooling, where moisture on the meat’s surface prevents further temperature increase.
- Typical stall duration: 2-4 hours
- Temperature range: 150-160°F
- Caused by meat’s moisture evaporation
Final Temperature Targets
Achieving the perfect internal temperature of brisket requires careful monitoring. Most pitmasters aim for a final internal temperature between 195-205°F. This range ensures the collagen breaks down, creating that melt-in-your-mouth texture characteristic of exceptional brisket.
Resting Temperature Guidelines
Resting is a crucial step often overlooked by amateur cooks. After removing the brisket from the heat, let it rest for 1-2 hours, allowing the internal temperature to stabilize between 140-160°F. This process helps redistribute juices, ensuring a more tender and flavorful result.
Pro tip: Wrap your brisket in butcher paper or foil during the resting phase to maintain optimal temperature and moisture.
Preparing Your Brisket for Smoking
Smoking a perfect brisket starts long before you fire up the smoker. Proper preparation is key to achieving a mouth-watering roast seasoning and ensuring your beef arm roast recipe turns out spectacular. The right preparation techniques can make all the difference between a good and an extraordinary brisket.
Begin by selecting a high-quality brisket with good marbling. Look for a cut that has a consistent layer of fat, which will help keep the meat moist during the long smoking process. Trimming is an art form – remove excess hard fat, but leave about 1/4 inch of fat cap to protect the meat.
- Select a brisket with even marbling
- Trim excess hard fat carefully
- Pat the meat dry with paper towels
- Bring meat to room temperature before cooking
For the ultimate roast seasoning, consider these preparation methods:
| Preparation Method | Benefits |
|---|---|
| Dry Brining | Enhances flavor and helps create a perfect bark |
| Meat Injection | Adds moisture and deepens flavor profile |
| Room Temperature Rest | Ensures even cooking and consistent internal temperature |
Pro tip for your beef arm roast recipe: apply your roast seasoning generously at least an hour before smoking. This allows the spices to penetrate the meat and create a flavorful crust. Use a blend of kosher salt, black pepper, and your favorite spices to create a robust flavor profile that will make your brisket truly memorable.
Best Seasoning Techniques for Flavorful Brisket
Seasoning transforms an ordinary brisket into a culinary masterpiece. The right blend of spices can elevate the meat’s natural flavors, creating a mouthwatering experience that delights the taste buds. Understanding different seasoning techniques allows home cooks and professional chefs to craft exceptional brisket dishes.
Traditional Dry Rub Methods
Classic dry rub seasoning forms the foundation of incredible brisket preparation. A traditional roast seasoning typically includes:
- Coarse black pepper
- Kosher salt
- Paprika
- Garlic powder
- Onion powder
Mexican-Inspired Seasoning Variations
Mexican steak seasoning brings a vibrant twist to brisket preparation. Authentic Mexican spice blends incorporate chili powders, cumin, and smoky elements that create a rich, complex flavor profile.
- Ancho chili powder
- Chipotle seasoning
- Smoked paprika
- Oregano
Italian-Style Brisket Preparations
Italian beef dishes showcase a remarkable approach to meat seasoning. Herbs and aromatic spices transform brisket into a Mediterranean-inspired delicacy. Key ingredients for Italian-style seasoning include:
- Dried basil
- Rosemary
- Thyme
- Garlic
- Red pepper flakes
Pro tip: Always apply dry rubs generously and let the brisket sit for at least an hour before cooking to allow spices to penetrate the meat.
Smoking Methods and Temperature Control
Mastering the art of cooking beef chuck roast requires understanding different smoking techniques and precise temperature management. Professional pitmasters know that successful barbecue depends on selecting the right smoking method and maintaining consistent heat throughout the cooking process.
Different smokers offer unique advantages for cooking beef chuck roast. Let’s explore the primary smoking methods:
- Offset Smokers: Traditional wood-fired method providing authentic smoky flavor
- Electric Smokers: Precise temperature control with minimal effort
- Pellet Smokers: Consistent heat and convenient wood flavor infusion
The “low and slow” technique remains critical for achieving tender, flavorful meat. Most experienced barbecue enthusiasts recommend maintaining temperatures between 225-250°F for optimal results.
| Smoker Type | Temperature Range | Cooking Time |
|---|---|---|
| Offset Smoker | 225-250°F | 6-8 hours |
| Electric Smoker | 225-275°F | 5-7 hours |
| Pellet Smoker | 225-250°F | 6-8 hours |
Advanced pitmasters often experiment with “hot and fast” methods, which can reduce cooking time while maintaining meat quality. Regardless of technique, consistent temperature monitoring remains essential for perfectly cooked beef chuck roast.
The Importance of the Brisket Stall
Smoking a brisket is an art that requires patience and understanding of its unique cooking dynamics. The brisket stall is a critical phase that challenges even experienced pitmasters, where the internal temperature of brisket seems to pause during the smoking process.
During the smoking process, pitmasters encounter a fascinating phenomenon known as the stall, which typically occurs when the internal temperature of brisket reaches around 150-160°F. This temperature plateau can last for several hours, causing frustration for those unfamiliar with the process.
Managing the Plateau Phase
Understanding the stall helps you manage your cooking strategy effectively. The stall happens due to evaporative cooling, where moisture on the meat’s surface prevents temperature increase. Experienced smokers recognize this as a natural part of the cooking process.
- Recognize the stall typically occurs between 150-160°F
- Expect the plateau to last 2-4 hours
- Monitor internal temperature closely
- Maintain consistent smoker temperature
When to Wrap Your Brisket
Wrapping becomes a crucial technique during the internal temperature of brisket stall. Two primary wrapping methods exist: the Texas crutch using aluminum foil and the more breathable butcher paper method.
- Foil wrapping: Speeds up cooking, softens bark
- Butcher paper: Preserves bark texture, allows slight moisture release
- Wrap when internal temperature reaches 160-170°F
- Ensure tight wrapping to prevent moisture loss
Mastering the brisket stall requires practice, patience, and understanding of meat science. Each smoking session brings you closer to perfecting this delicious barbecue tradition.
Common Temperature Mistakes to Avoid
Mastering the chuck roast temp requires precision and attention to detail. Many home cooks make critical errors that can transform a potentially delicious meal into a disappointing dinner. Understanding these common mistakes will help you become a more confident cook when preparing beef dishes.
When cooking beef chuck roast, temperature control is paramount. Here are the most frequent pitfalls to watch out for:
- Relying exclusively on cooking time instead of internal temperature
- Neglecting meat thermometer calibration
- Improper thermometer placement
- Ignoring carryover cooking during resting phase
“The difference between a perfect roast and a tough piece of meat often comes down to just a few degrees.” – Professional Chef
Cooking beef chuck roast demands careful monitoring. Inaccurate temperature readings can lead to undercooked or overcooked meat, compromising both flavor and texture.
| Common Mistake | Potential Consequence |
|---|---|
| Using Unreliable Thermometer | Incorrect Internal Temperature |
| Not Accounting for Resting Period | Dry, Overcooked Meat |
| Inconsistent Smoker Temperature | Uneven Cooking |
Professional chefs recommend investing in a high-quality digital meat thermometer for precise chuck roast temp measurements. Always insert the thermometer into the thickest part of the meat, avoiding fat pockets or bone areas that can provide misleading readings.
By understanding these common temperature mistakes, you’ll be well-equipped to create perfectly cooked beef dishes every time.
Perfect Side Dishes for Your Brisket
Elevating your brisket meal goes beyond the main dish. The right side dishes can transform a good barbecue into an unforgettable culinary experience. Whether you’re serving steak or brisket, selecting the best side dishes for steak can make all the difference in your dining presentation.
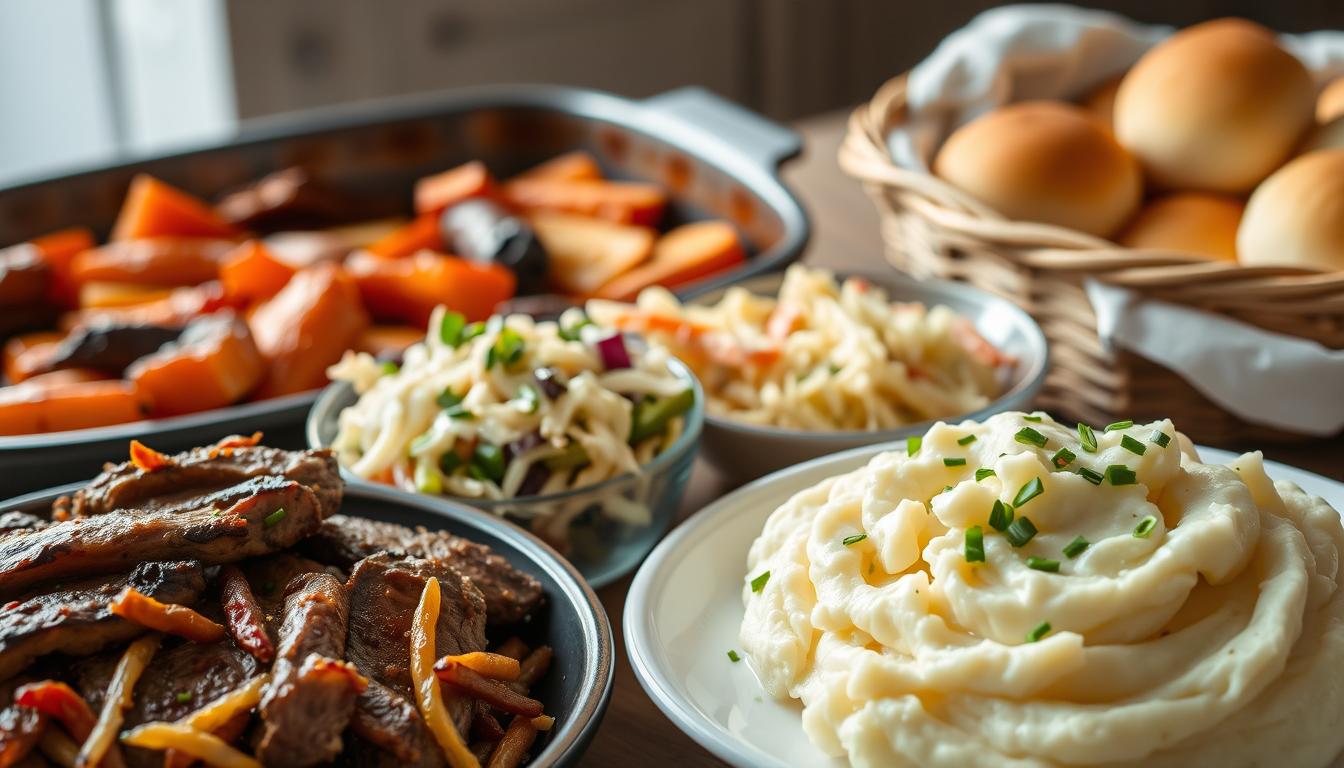
Crafting the perfect meal involves balancing flavors, textures, and nutritional value. Healthy sides for steak and brisket can complement the rich, smoky meat while adding essential nutrients to your plate.
Classic Pairings
Traditional side dishes bring comfort and familiarity to your brisket meal. Consider these timeless options:
- Creamy coleslaw with a tangy dressing
- Baked beans with a touch of brown sugar
- Crispy mac and cheese
- Buttery corn on the cob
Healthy Side Options
For those seeking nutritious alternatives, these healthy sides for steak offer both flavor and wellness:
- Roasted vegetable medley
- Quinoa salad with fresh herbs
- Grilled asparagus with lemon zest
- Sweet potato mash
Seasonal Accompaniments
Embrace the flavors of each season by incorporating fresh, local produce into your brisket sides. Summer might call for a light farmer’s market salad, while winter welcomes hearty roasted root vegetables.
Pro tip: Match your side dishes to the cooking style of your brisket for a harmonious meal experience.
Storing and Reheating Cooked Brisket
Preserving the delicious flavor of your brisket requires careful storage and reheating techniques. Whether you’re looking to create high protein ground beef recipes or simply save leftovers, proper handling is crucial for maintaining meat quality.
Refrigeration is the first step in keeping your brisket fresh. Wrap the meat tightly in aluminum foil or place it in an airtight container. For optimal freshness, consume refrigerated brisket within 3-4 days. When preparing high protein ground beef recipes, shredded brisket can be an excellent protein-rich ingredient.
- Cool brisket to room temperature before storing
- Use airtight containers or heavy-duty freezer bags
- Label with date and contents
- Store in the coldest part of the refrigerator
Freezing extends brisket’s shelf life up to 3 months. Pro tip: Slice or shred the meat before freezing to make it easier to use in future high protein ground beef recipes. When ready to reheat, choose methods that preserve moisture:
- Oven method: Cover with foil, heat at 325°F
- Sous vide: Maintains perfect moisture and temperature
- Steaming: Keeps meat tender and juicy
Always reheat brisket to an internal temperature of 165°F to ensure food safety. Transform leftover brisket into exciting dishes like tacos, shepherd’s pie, or hearty stews that maximize its rich flavor and protein content.
Troubleshooting Temperature Issues
Mastering the internal temperature of brisket requires skill and patience. Cooking beef chuck roast or brisket can present unique challenges that even experienced pitmasters encounter. Understanding how to manage temperature fluctuations is crucial for achieving perfect results.
Temperature control is an art form that demands attention to detail. Unexpected issues can derail your cooking process, but with the right techniques, you can overcome most challenges.
Identifying and Managing Hot Spots
Hot spots in your smoker or grill can create uneven cooking, leading to inconsistent results. Here are key strategies to address this problem:
- Use a reliable digital thermometer to map temperature zones
- Rotate the brisket every hour to ensure even cooking
- Place a water pan to create a more consistent heat environment
- Consider using heat deflectors or ceramic barriers
Temperature Recovery Methods
When cooking beef chuck roast or brisket, unexpected temperature drops can happen. Quick and strategic responses are essential:
- Add fuel gradually to maintain steady heat
- Close smoker vents partially to stabilize temperature
- Use a heat shield to protect meat during temperature adjustments
- Monitor internal temperature closely during recovery
Pro tip: Patience is key when managing temperature fluctuations during slow cooking.
By implementing these techniques, you’ll become more confident in handling temperature challenges and produce consistently delicious brisket.
Conclusion
Achieving the perfect brisket is a culinary adventure that revolves around understanding the internal temperature of brisket. From selecting the right cut to managing precise heat levels, each step plays a crucial role in creating a mouthwatering masterpiece that will impress your family and friends.
The key to remarkable brisket lies in patience and technique. By carefully monitoring the internal temperature of brisket throughout the cooking process, home chefs can transform a tough cut of meat into a tender, flavorful dish that melts in your mouth. Professional pitmasters know that temperature control isn’t just a technique—it’s an art form that requires practice and dedication.
As you continue your barbecue journey, remember that every brisket is unique. The skills you’ve learned about temperature management, seasoning techniques, and cooking methods will serve as your foundation. Don’t be afraid to experiment, take notes, and develop your personal approach to creating the ultimate brisket experience.
We invite you to share your brisket stories, successes, and challenges with fellow cooking enthusiasts. Your passion for great barbecue keeps the tradition alive and helps others learn and grow in their culinary skills. Keep experimenting, stay curious, and enjoy the delicious results of your hard work!
FAQ
What is the ideal internal temperature for a perfectly cooked brisket?
The ideal internal temperature for brisket is between 195°F and 205°F. This range ensures the collagen breaks down, making the meat tender and juicy. Most pitmasters aim for around 203°F as the sweet spot for maximum tenderness.
How long does it take to cook a brisket?
Cooking time varies depending on the size of the brisket and cooking method. Typically, a low and slow approach at 225-250°F takes about 1-1.5 hours per pound. A 12-pound brisket could take 12-18 hours to reach the perfect internal temperature.
What is the “stall period” when cooking brisket?
The stall period is a phase during cooking where the internal temperature seems to plateau, usually around 150-160°F. This occurs due to evaporative cooling and can last 2-4 hours. Pitmasters often use the “Texas crutch” method of wrapping the brisket to push through this phase.
What are the best seasonings for brisket?
Classic brisket seasoning typically includes kosher salt and coarse black pepper. Mexican-inspired rubs might incorporate chili powder, cumin, and smoked paprika. For an Italian twist, try a blend of rosemary, thyme, and garlic powder.
How do I know when my brisket is done?
Use a reliable meat thermometer to check the internal temperature. Beyond the numbers, look for these signs: the meat should feel soft and tender when probed, and you should be able to pull it apart easily. The bark should be dark and crispy.
What are the best side dishes to serve with brisket?
Classic sides include coleslaw, baked beans, and mac and cheese. For healthier options, try roasted vegetables, cauliflower rice, or a fresh green salad. Seasonal accompaniments like grilled corn or sweet potato hash also pair wonderfully with brisket.
How should I store leftover brisket?
Store leftover brisket in an airtight container in the refrigerator for 3-4 days. For longer storage, wrap tightly and freeze for up to 3 months. When reheating, use low and slow methods like oven warming or sous vide to maintain moisture and tenderness.
What type of smoker is best for cooking brisket?
Each smoker has its advantages. Offset smokers offer traditional flavor, pellet smokers provide consistent temperature, and electric smokers are great for beginners. The key is maintaining a consistent temperature and managing smoke production.
Can I cook brisket in the oven?
Absolutely! While traditional methods use a smoker, you can achieve great results in the oven. Use a heavy-bottomed roasting pan, cover tightly with foil, and cook at a low temperature (around 275°F) until the internal temperature reaches the desired doneness.
How important is resting the brisket?
Resting is crucial. After cooking, let the brisket rest for 1-2 hours, wrapped in butcher paper or foil. This allows the juices to redistribute, ensuring a moist and tender final product. Resting helps the internal temperature stabilize and improves overall flavor and texture.